Use Blob Storage for Your Static Site Images
The purpose of this post is to show how easy it is to use cloud storage for your static blog’s binary resources. I’ll be showing specific examples for Azure Blob Storage and GitHub Pages, but the same principles should apply to AWS, as well as any other static blogging service.
Avoid Large Binaries in Git
When ever you check a file (or a change to an existing file) into Git, it stores a snapshot of the entire file. This behavior has many nice benefits, but it means that large files can quickly bloat the size of a Git repository.
Culprits can include images, videos, and executables, to name a few. Since we’re specifically talking about static blogging, we’ll focus on images.
Suppose you add an image to your post. If the image takes up 200KB, you’re automatically increasing your repository size by around 200KB (ignoring extra Git metadata). Every time you modify that image, you’re adding yet another 200KB. Doing this for a few dozen blog posts can quickly balloon your repo.
Now imaging doing this with a GIF instead. Yikes.
Move Your Images To Blob Storage
I’m not going to cover redirecting existing images to blob storage. When I switched over, I had few enough images that I just decided to manually update the posts that referenced them. If you have enough images, it may not be reasonable to manually update the posts that reference them. In that case, you can either try to automate it with a glorified perl script, or just leave the old posts alone and just upload new images to blob storage.
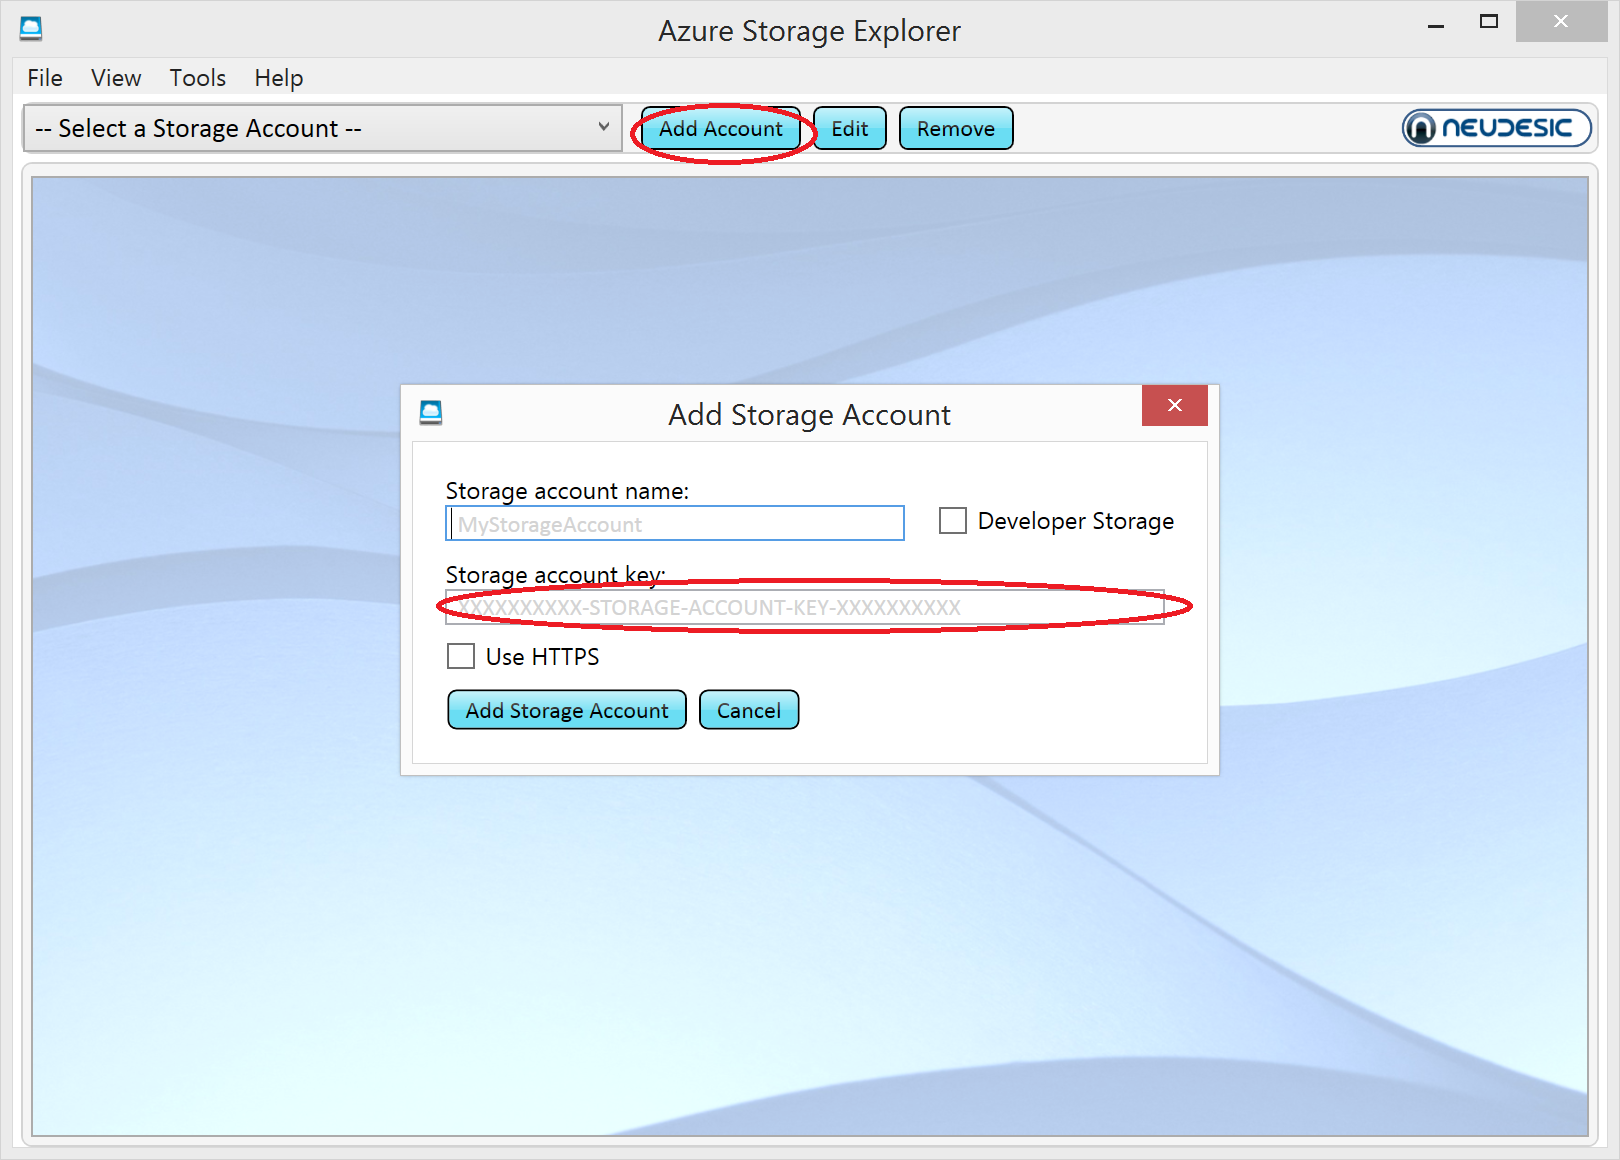
If you’re using Azure for your images, you’ll want to grab a copy of Azure Storage Explorer. It’s a handy little Windows application that gives you a CRUD view into your storage account. My series on Azure Blob Storage and Node covers setting up your storage account and getting your access keys, so I won’t go over that again. Just grab one of your access keys and paste it into the “Storage account key” field in Storage Explorer’s “Add Storage Account” popup.
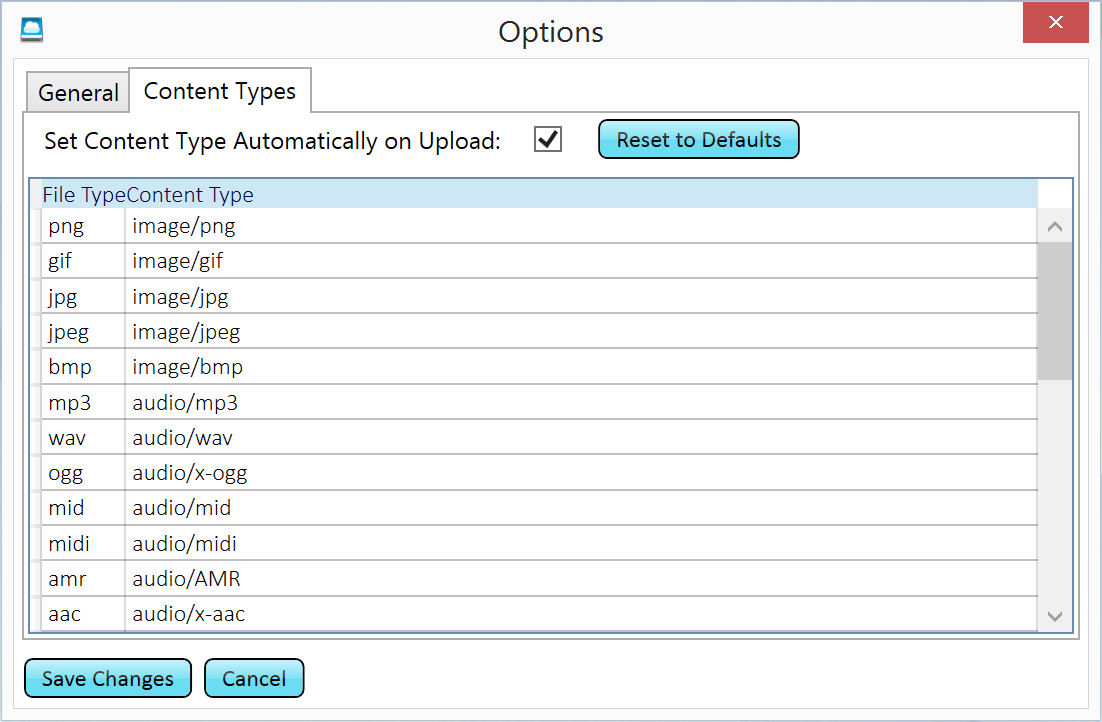
As a last configuration step, open Tools → Options and go to the “Content Types” tab, then click “Save Changes”. Storage Explorer can automatically set content types based on file extensions, but for some reason it’s not enabled by default. Opening and saving the options seems to be enough to activate it.
Now that you’ve configured Storage Explorer, you can upload your images. First, create a container. Make sure you set permissions to “Public Container” or “Public Blob” so the images can be seen by unauthenticated users.
Now, inside the container, click “Upload”. You can select multiple images. Once they’ve uploaded, double check that their content types are correct. The default is application/octet-stream, which most browsers will try to download, rather than display as an image. The public URL for a given image is pretty easy to get from the storage account, container, and blob name, but if you’re not sure, just double click the blob, and it’ll show you the public URL.
That’s about it. Happy blogging.